Refurbishing a Hopper shade
Very rarely (+/- 60 min)
Shit happens. Sometimes the fabric of your umbrella rips, gets stains, or maybe you just want to change the color.
Hey! You don’t need to be an engineer to understand our products, and you don’t even need to be great at DIY to replace a part. We're here to help you, follow the steps below to replace the fabric of your Hopper shade.
Instructions
- Close the Hopper shade
- Tighten the 2 fastening screws…
until they lock fabric bars - Remove the 8 bolts on the rectangular poles
Repeat this step for each bolt - Remove the fabric from the poles
Caution! Grab the fabric, not the thin metal tube
Caution! This is heavy - Place the fabric on a clean and stable surface
Position the shade with the bars facing outwards - Remove two black blocks
Pick the ones without a safety pin - Unscrew the 2 bolts under the sticker of the block
Caution! Only remove the black blocks on one side - Remove the tubes from the remaining black blocks
Caution! Keep the remaining black blocks in place - Remove the safety out of one of the remaining black blocks
You'll hear the spring unroll - Now remove the remaining black blocks
- Unroll one side of the fabric
- Unscrew the fastening screw…
… and remove the plug
Repeat this step on both sides - Push the stick out of the groove with a thin, blunt object
And pull it out - Push out the ends of the tube with the hammer
- Remove the tube from the fabric
- Put on gloves or wash your hands thoroughly
- Take your new fabric
- Roll it open with the seams facing downwards
- Insert one end to the fabric
- Insert the tubes in the fabric
The spring on the left tube should face to the left
The spring on the right tube should face to the right - Insert the other end to the tube
- Roll the tube to the center so that the groove faces upwards
- Place the inner tube so that the groove is at 2 cm from the seam
- Push the fabric above the seam into the groove
Slide the stick in the groove
Do this bit by bit to prevent wrinkles - The bar should be placed at 4.5 cm from the end
And repeat on the other side - Fasten the plugs on the sides of the bar
- Now repeat all the steps on the other side
- Roll the fabric on the tubes towards the center
Two sides of the tubes have a 'flat' side, these should face inwards - Fasten the two black blocks with a safety pin onto the tubes with the flat side
Fasten the bolt and the fastening screw - Turn the blocks towards the center to wind up the spring
When you feel tension, turn the block 9 times
And click it in to secure
Caution: the blocks are under spring tension now! Be prudent! - Fasten the metal tubes with the label on the strap facing downwards
- Fasten the remaining black blocks on the tubes
And attach the bolts - Slide the fabric into the poles
Caution! Grab the fabric, not the thin metal tube
Caution! This is heavy - Fasten the bolts in each pole
- Fasten the safety pin in the black blocks
You're all set!

Tools
These are the tools you need
- New fabric
- Hex key #2
- Hex key #2,5
- Hex key #5
- Hex key #9
- Rubber hammer
- A blunt object like a bottle opener
- Tape
- Ruler
- A friend
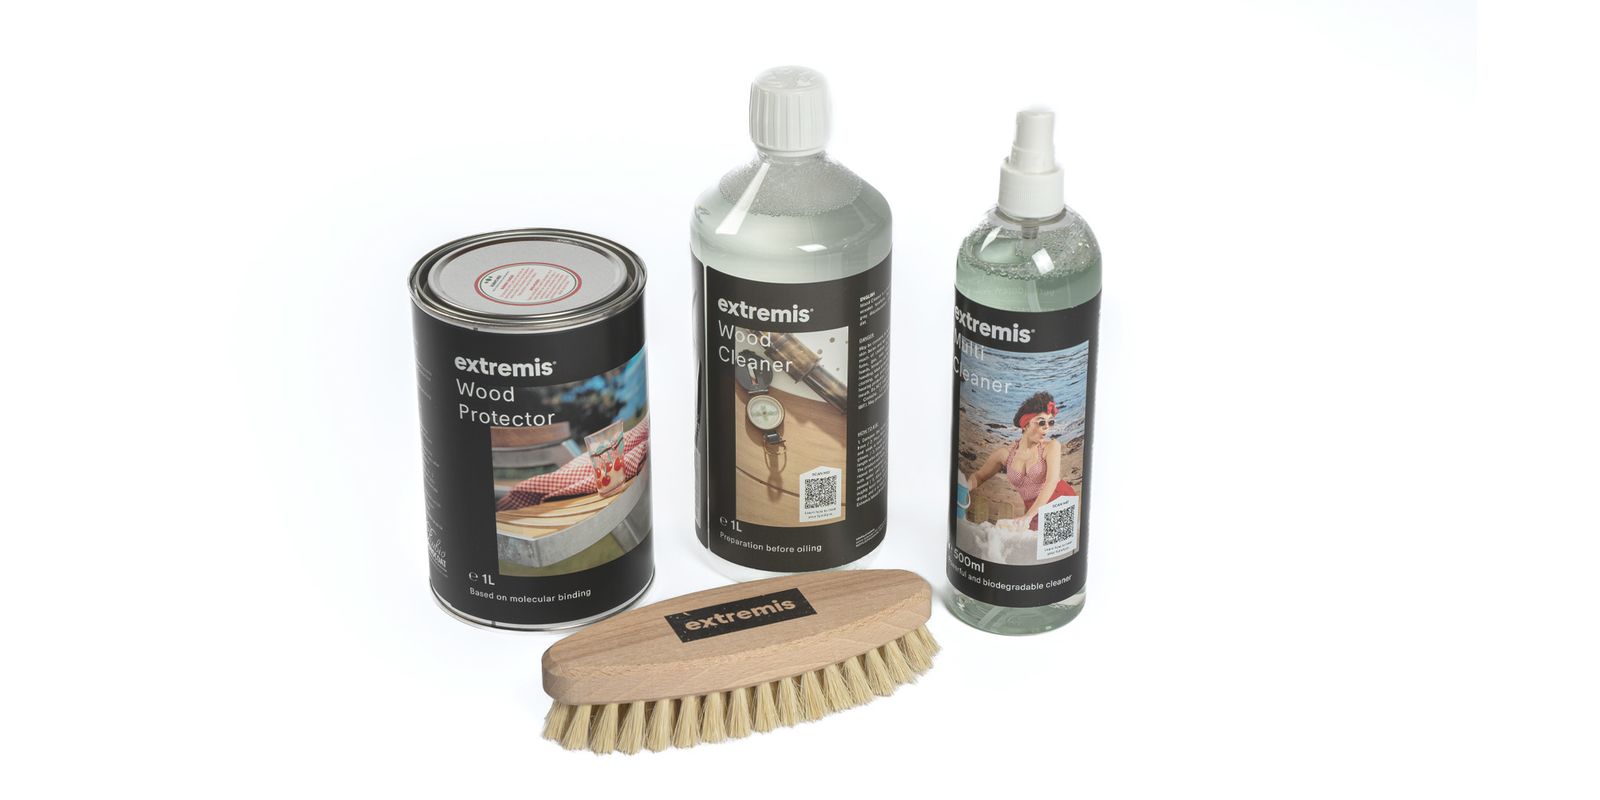
Our maintenance tools
It's a kind of magic
Although highly resistant to UV radiation, slight discoloration will appear over time. Protect your shade to the fullest with the cover and regularly clean the stainless steel poles to keep them stain-less.
We offer a fine selection of maintenance tools that help you keep your Extremis furniture in shape in our webshop.
Need more guidance on how to take care of your tool for togetherness?